Showing posts with label Scratch Building. Show all posts

Monday, May 2, 2016

Tamiya Late Version Tiger 1 update 5

It has been some time but progress has slowly progressed.


Some paint on the figures


Some more paint and some tracks and weathering on the tank. also Some bridge of a diorama in the background


Oh shiny metal look. pencil rubbing and more grime


Some blocks on the back of the bridge. They are made from red das clay


The front of the bridge..no blocks yet. but the beginnings of a base


Cobblestone roadway from the white das clay.
Its all a bit of a mess still but I have some idea of where I`m going with it
The plan is to have some railway tracks running on top of the bridge, if I can successfully scratch build them


Sunday, February 14, 2016

Pz.Kpfw.I mit Abwurfvorrichtung Update 8

Doing a bit more with the diorama base, added some static grass and some sand as little rocks. The bulrushes are in place, some moss for small bushes and a different moss for the first layer of foliage on my twig tree

The plan is to have a little pond/stream with the tank running through it. I have to finish up painting the tank and tracks before adding the water as it will hopefully be a little submerged into the water.
I have run into a little difficulty with my matt varnish, it no longer dries matt more of a satin\gloss result( I have stirred, shaken, even prayed to the many tentacled devourer that lives in the carpet but all to no avail). It has put a little delay on my plans until I can get some replacement

Tuesday, February 9, 2016

Pz.Kpfw.I mit Abwurfvorrichtung Update 7

Started a bit of work on a base for my panzer, an old picture frame to start, built up the rough contours with some Styrofoam, coated it in pva and put some das clay on top, added some thin slips of wood around the edges.

Added some stones half buried in the clay and tried out some bulrushes that I made a while back,started shaping the wood around the edges.
I had a little brown paint left in the air brush after painting the camo on my tiger so I sprayed it on. finished shaping the wood on the edges and painted it black.

The star in doing a rehearsal.

Wednesday, December 23, 2015

Scale Model Church Update 12

What every church need for Christmas - a crib. Matchsticks tiny twigs and moss all stuck with wood glue.

Who knew that pocket cribs were a thing. Something the size of a ring box with tiny nativity figures inside. I had to have it and take it apart.

A quick dab of paint on the figures and done.

All the stained glass is in and doors and lights glued in place.
All thats left now is to turn it into a white Christmas

Sunday, December 20, 2015

Scale Model Church Update 11

I went back and covered the base in das modelling clay . I was not to happy with the surface texture left by the plaster. Then sprayed on some greens and browns

Then white glue and some fine sand to represent gravel around the building
Then more glue and some static grass sprinkled over top.
Then stuck on larger stones as a border between grass and gravel.
a few bits of moss as bushes. And somewhen in there the bell was glued in.


Wednesday, December 16, 2015

Scale Model Church Update 10

I have seen this technique used on plastic models, mainly tanks.
After coating the model in a clear coat of gloss varnish (this needs to be acrylic based) to protect previous layers of paint you place random dots of many colours of oil paint all over the surface.

Then with a brush moistened with white spirits you blend them into the surface, in the process removing most of the oil paint. It should leave a very subtle discolouration which adds some depth to the surface.
Obviously it dose not show well in my photos. You'll have to trust me in that I think it adds to the finish.

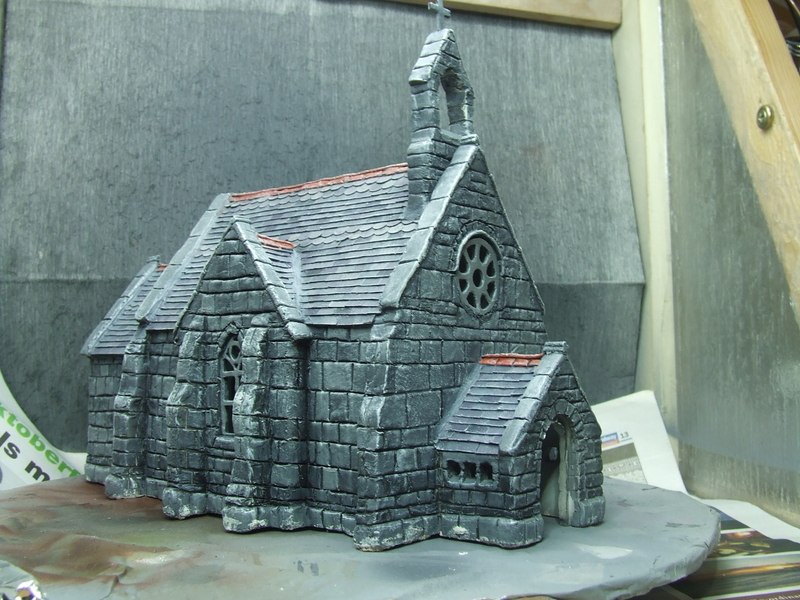
The whole church with this effect added. I concentrate a little extra green around the base stones and used some white to lighten the rows of curved tiles.

Tuesday, December 15, 2015

Scale Model Church Update 9 Doors

Basla wood with the opening traced on to it

Shape cut and rounded off with a sanding stick. Then halved.

Boards impressed with a fine pointed pencil. Also tiny bits of plastic cut out for hinges. The plastic came from a model kit of H.M.S. Victory, the bits left over when the sails were cut out. Its for reasons like this that I have trouble throwing away "junk"

Little bits of wire cut off for the barrels of the hinges. Also the doors painted a slightly blotchy red.

Hinges mounted with a little wood glue

The bolts on the hinges were added by lightly touching with a fine brush dipped in wood glue. Repeated in a couple of spots to increase their height.
Hinges painted with gunmetal.
Starting on the handles, tiny beads and brass wire

A drop of wood glue to stick them together.

And another drop on top to bulk them up a bit.
They are being called done at that.

Friday, December 11, 2015

Scale Model Church Update 8

Work on the base for the church has started. Its made from basic Styrofoam covered in wood glue and bonding (some type of plaster) smeared on top.
A quick test for light leakage. not too bad a couple of small spots around the base will need patching to cover some gaps

The building has been dry brushed all over with a slightly off white, bringing all the different shades closer together.

More soon.

Monday, December 7, 2015

Scale Model Church Update 7

Just painting all the blockwork in the many shades of gray
Right now it looks a bit too patchwork .

But with a little dry brushing you get a bit of unification of the colors.

Saturday, December 5, 2015

Scale Model Church Update 6

Things a proceeding at a quicker pace
Finished up the roof by adding the ridge tiles. Then sprayed everything in black acrylic primer.

Then sprayed a light coat of gray at an angle to bring out the detail.
Followed by pickin out the individual tiles in various shades of slate, touches of purple, gray, black and sand combined in varying amounts.

And mixed up a terracotta shade for the ridge tiles. Once its fully dry we will bring it all together with a mix of washes and dry brushing.
Also the flashing on yje joins needs a touch of a lead colour.

More soon.


Friday, December 4, 2015

Scale Model Church Update 5

Nearly to the painting stage window frames fitted, no glass yet hopefully it wont be too much of a problem adding it later. I want to paint first and not get it on the glass.

Stacks of roof tiles cut from cereal boxes to make the roof. there is a ridge tile yet to be done. We`ll make it from das clay because I want to put a circular profile along the top.
Sprayed a little black paint on to test for small gaps around the windows. We are planning on putting some lights inside so we don't want it leaking around the edges.
More to come soon.

Friday, November 20, 2015

Scale Model Church Update 4

More clay and scribing block-work. Once the clay is fully dry it will need a bit of clean up with files, knives and sandpaper.
 Also got the round window carved from balsa wood. I might just use the wood version or replicate it in Milliput
And painted the bell. I had some powered rust which I added to the bell while the paint was still wet. it adds a nice bit of texture to the surface. A quick rub over the edges with a pencil adds a bit of metallic sheen.

Tuesday, November 10, 2015

Scale Model Church Update 3

We have started coating and sculpting the church with Das Modeling Clay
You start with a layer of wood glue
Then roll out the clay to the required thickness
Smooth it on to the area 
And press in the shape of your blocks.
If you cant spent the time to do the whole model at once cover the clay areas with wet kitchen paper and stick it in a plastic bag, that will prevent it drying and hardening until you can continue.

The bell was cut from a bottle cap, it was an eyedropper type of bottle so it had a bit of its profile in the right shape. I`ll be removing it again for painting nearer the finish.

Friday, November 6, 2015

Scale Model Church Update 2

Still adding the last few bits before covering it in clay
 Testing out an idea for the stained glass. Start with a piece of clear plastic, in my case a bit from packaging on some nail files.
Score the pattern on to the plastic with the back of a blade.
Rub in black oil paint  to the resulting groves and wipe off the excess.
Then use oils to paint the individual panes of glass very lightly. Lightly enough to let the light show through.
Wait for the oils to dry....this can take some time. Then glue together carefully.